Manually Install Android Marshmallow OTA on Moto G3
Let us help you install the latest Android Marshmallow OTA on Moto G3! Advertisement The Moto G3 has lately received the Android Marshmallow update. Thankfully, the manufacturer has not kept the G3 […]
Let us help you install the latest Android Marshmallow OTA on Moto G3!
Advertisement
The Moto G3 has lately received the Android Marshmallow update. Thankfully, the manufacturer has not kept the G3 crowd waiting much. The release may have taken a month or so, but is definitely a plus. The over-the-air update is rolling out worldwide, but a few countries are still lined up. So if you do not intend to wait and just want it right now, read the steps below and have the sweet taste of Android Marshmallow on your G3.

On the other side of this official world, at the XDA forums, people are not so keen on waiting. XDA member dd98 has collected all the OTA files for different Moto G3 models under one roof. The available models include – XT1540, XT1542, XT1543, and XT1544.
Advertisement
You can download the OTAs corresponding to your model and sideload it via the stock recovery. Keep in mind that, this will not work on a rooted phone, and neither if TWRP is installed.
Disclaimer
Sideloading a wrong update zip may soft-brick your Moto G3. We shall not be held responsible for any damage to your phone. However, if you manage to get yourself into such situation, we will definitely provide you a helping hand.
Before You Proceed
- Charge your Moto G3 to at least 60% battery level to avoid any interruptions during the update process.
- Backup the phone completely, including internal storage, SMS, contacts, apps, etc.
Manually Install Android Marshmallow OTA on Moto G3
- Download the OTA corresponding to your Moto G3 model number and transfer it to the G3’s SD card root directory (not in any folder): Link
- Disconnect the phone. Long-press the power button until you see the power menu, and select Power off.
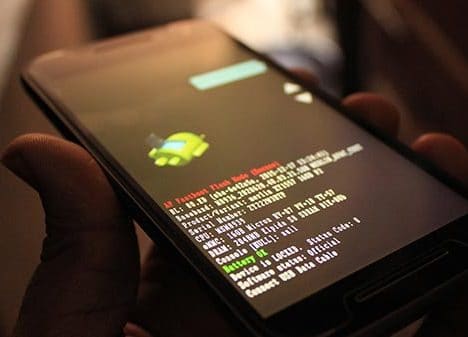
- Once the Moto G3 has shut down completely, press and hold the Volume Up, Volume Down, and Power keys for 3-4 seconds and release them. You shall now see the bootloader mode.

- Now, use the Volume Down key to highlight Recovery, and select it using the Volume Up key.
- A warning Android logo will appear on the screen now. While pressing the Volume Up key, press and release the power button once. The stock recovery should appear now.
- Use the volume keys to highlight Apply update from sdcard, and select it using the power button.
- The recovery will automatically detect the OTA file in the SD card’s root directory and flash it.
- Once the flashing process is done, it is advised to select wipe cache partition, and thereafter select Reboot system now.
You have successfully installed Android Marshmallow OTA on Moto G3. If you have gone through any issues during the installation, or after that, you can post a comment below and let us know. Also if you have accidentally soft-bricked your Moto G3, you can restore it back to stock, and we will help you do just that!