How to Manually Install Moto X Pure Nougat OTA
Moto X Pure Edition finally gets the Nougat update. Follow this guide to manually install Moto X Pure Nougat OTA on your device right now! Advertisement Indeed, Motorola has lately been the […]
Moto X Pure Edition finally gets the Nougat update. Follow this guide to manually install Moto X Pure Nougat OTA on your device right now!
Advertisement
Indeed, Motorola has lately been the company who abandoned many of its devices when it comes to updates. Only a handful of old devices from Motorola have seen more than one major Android version and others were just left to die. At least that’s not going to be the case today for the Moto X Pure Edition. The device was launched 2 years ago and came with Lollipop out-of-the-box. It was updated to Marshmallow a few months after the release in December 2015 and has only been fortunate enough to recieve security patches until Decemeber 2016. A complete year of no updates whatsoever, the Moto X Pure Nougat update has finally arrived.

Several users on XDA have already reported that they have started receiving an update notification for Android 7.0 Nougat in the US. However, there has been no official announcement from Motorola’s end. It seems like the company is not ready to do until the rollout begins worldwide.
- Manually Update Moto X Force to Marshmallow
- Moto G 2014 Marshmallow Update – Manual Installation
- Install Android Nougat Firmware on Galaxy J7 2016
- How to Install Nokia 3 Android Nougat 7.1.1 Update
If you have still got your hands on the device running stock Marshmallow, you can follow this guide to manually install Moto X Pure Nougat OTA.
Advertisement
Page Contents
Moto X Pure Nougat Update
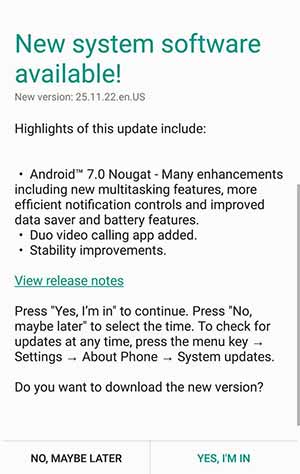
The update is ready for those who are in the US. You may just head over to Settings > About phone > System updates and check if you have already got it for your device. The current update is still based on Nougat 7.0 with the latest September Security Patches, fixing the infamous BlueBorne vulnerability. The Build number as tagged with the Moto X Pure Nougat update is NPH25.200-22.

Thankfully XDA member – gokart2 has managed to grab the OTA zip and mirrored it on Google Drive. The action has been a blessing for those who are still struggling to update in regions other than the US. You can pick up this OTA zip and manually install it on any Moto X Pure Edition phone using the stock recovery.
So now, go on and install Moto X Pure Edition Nougat OTA manually.
Steps to Install Moto X Pure Nougat OTA
Manually installing the OTA requires your device to be complete stock, which means you should not have any custom recovery, ROM, or root installed on your device. If so, then please return back to stock Marshmallow and then follow this guide.
Requirements
- As mentioned above, your Moto X Pure Edition device should be in completely stock state.
- The current Marshmallow build installed on your device must be 24.49-18-16.
- Take a backup of your phone: Tutorial
Instructions
- Download the Moto X Pure Nougat OTA package:
- Connect your phone to the PC in MTP/File Transfer mode and copy the OTA zip to the root (Not in any folder) of the internal storage.
- Disconnect the device and power it down.
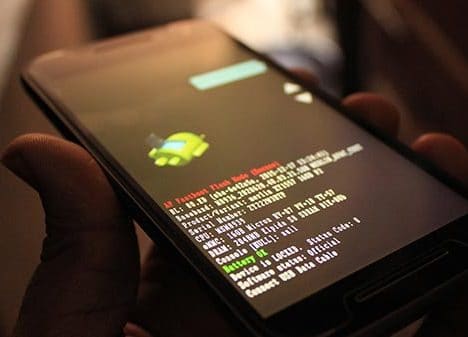
- Press and hold the Volume Down + Power buttons until you see the bootloader mode.
- Now, tap on either of the volume keys a few times until you see “Recovery” selected. Then tap on the Power key once to boot into recovery mode.

- The device will not directly enter into stock recovery, you will see an Android bot with no command text on the screen. When you do see this, press and hold the Power button and tap the Volume Up button once.
- Your device should now be in stock recovery.
- Navigating in stock recovery is not operated by touch. You will need to use the Volume keys to highlight an option and select/enter it using the Power button.
- So highlight “apply update from phone storage” or “apply update from SD card” and select it by pressing the Power key.
- You should now be seeing the “Blur_Version.24.231.16.clark_retus.retus.en.US.zip” file selected, so just press the Power button to select it and begin the update process.
Now, let the update take its course and wait for it to finish. Once it does, select “reboot system now” option.
Moto X Pure Nougat update has now been installed on your device. You can now enjoy all its major features include split-screen multitasking, improved Doze, notification controls, data saver and much more. You also move along and root Moto X Pure on Nougat using Magisk.
— How to Install Magisk Systemless Interface
If you have problems installing this update or rolling back to stock Marshmallow, you can let us know by commenting.
Comments 9 Comments
Thank you so very much for this post, the file and instructions. I updated my phone last night and noticed a huge improvement in battery life today and feel much better knowing that the security patches have been applied. I would not have undertaken this without your help, it is very much appreciated after the long wait for this update.
Good to know Mark! Enjoy the new update.
After some research and thinking about it, The issue ended up being I was using the SD card as internal storage.
Once I reversed that and formatted the SD card as external, both internal storage and SD card showed in windows explorer using MTP.
I had forgotten I did that with the SD card.
I copied it to Internal and chose update from SD card on the boot and there it was ;=)
Update was successful.
I have to admit that Lenovo logo flipping around for awhile had me nervous but then Android was finishing it’s updating and voila’ I have Android 7.0. Thanks so much.
Great! Glad you got it updated! And you’re welcome 🙂
I tried this and only the SD card shows when I’m connected via MTP mode. Internal Storage is not available. Is there a way to correct this?
I did get it to work by doing the following:
– Turned off the phone and ejected the SD/SIM tray
– Turned it on and switched to MTP mode on the phone. Internal Storage was now visible in Windows Explorer
– Copied the update ZIP over to the Internal Storage and performed the steps above again
Thank you for notifying. It seems like for those using adoptable storage, needs to eject the SD card for the time being and then copy the OTA zip to the internal storage over MTP.
Can I just flash the zip through twrp?
I wouldn’t recommend that. The OTA zip will detect that the system has been modified and fail to install. I would advise you to turn back completely stock and then use this OTA method.