How to Install TWRP Recovery and Root HTC U Ultra
Got the latest from HTC? It’s time to install TWRP and root HTC U Ultra. The latest flagship device from HTC; the U Ultra was announced last month. The 5.7 inches screen […]
Got the latest from HTC? It’s time to install TWRP and root HTC U Ultra.
The latest flagship device from HTC; the U Ultra was announced last month. The 5.7 inches screen phablet is all about “U” and features the dual-display technology. The second screen is there to assist you to get things done fast, contacts, shortcuts, notifications, you name it! The USonic technology adapts to your listening to output the best audio experience. The phone has a lot more to offer than you know.
Advertisement
Now that you have got the device and unlocked its bootloader; you can go ahead, install a custom recovery and root your HTC U Ultra. We also recently talked about the new TWRP update that supports the U Ultra. Once you have TWRP installed, you can use it to root your device pretty easily.

Page Contents
Prerequisites
- The first requirement is that your device should have an unlocked bootloader. If you still haven’t done it yet, you can unlock it easily using the official method.
- Take a complete backup of everything before moving ahead. This includes messages, contacts, internal storage, and everything else that is necessary.
- Charge your U Ultra to at least 60% battery level to avoid any mishaps during the process.
- Install and setup Android SDK platform-tools on your PC.
- Enable USB debugging on your U Ultra. Don’t know how? This guide will help you.
- Install HTC USB drivers on your PC.
Install TWRP Recovery
- TeamWin officially supports the U Ultra. So all you need to do is download the fastboot flashable image: Link
- Connect your device to the PC using an appropriate USB Type-C cable.
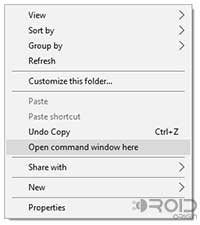
- Go to the folder where the platform tools (ADB and Fastboot) package was extracted and copy the TWRP image in there. Press the SHIFT key and right-click on an empty space inside the folder. Select Open command window here from the pop-up.

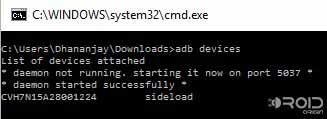
- Confirm that your device is properly detected by the PC:
adb devices
- The command should return a device ID. If it doesn’t, make sure you have the drivers installed properly.

- Time to boot your device into fastboot mode:
adb reboot download
- Your phone will reboot automatically into the fastboot mode. Now flash TWRP using the following command:
fastboot flash recovery filename.img
Here, the “filename.img” will be replaced with the name of the recovery image filename. Example:
fastboot flash recovery twrp-3.2.3-0-oce.img
- Finally when the recovery flashing procedure is complete, reboot your device by typing in:
fastboot reboot
So now that you have installed TWRP, you can go ahead and flash custom ROMs, kernels, and mods on your device (When and if they are available). If you would only like to use stock firmware with root, follow the instructions below.
Advertisement
Root HTC U Ultra
The most common and entrusted method to root HTC U Ultra is by flashing Magisk through TWRP. Rooting your device will give you access to the system partition and also allow you to use root-enabled apps.
- Download Magisk installer zip: Magisk-v18.0.zip (More info and changelog)
- If you have downloaded the file to the device itself; cool! If not, just connect it to the PC and transfer the file to the storage.
- Open a command prompt/CMD window and reboot your U Ultra into recovery mode:
adb reboot recovery
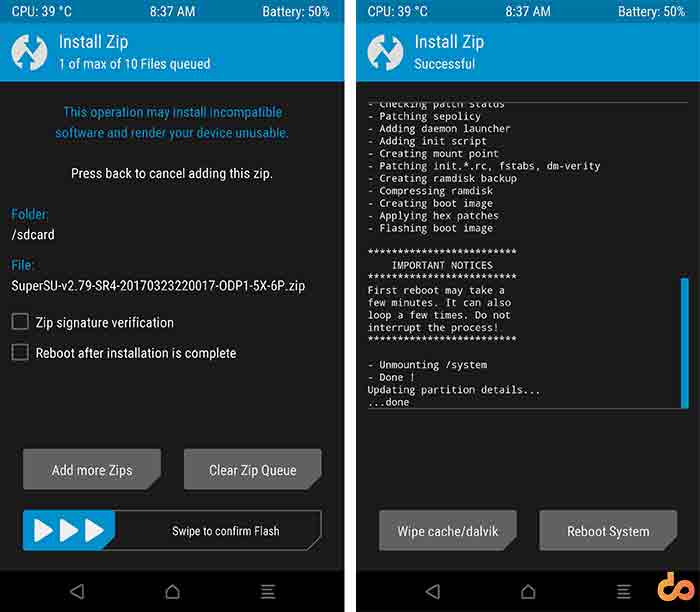
- Once your device enters TWRP, tap on Install. Browse the storage and select SuperSU-v2.79-201612051815.zip. Confirm the process to start the flashing process.

- It will take a few seconds and once the process is complete, tap on Reboot System.
Congo! So you have just rooted your U Ultra. Go ahead, there are a lot of things you can do with it. However, don’t simply rush and install the first thing you find. Read carefully and then only use something.
If you face any problems during the process, let us know by dropping a comment below.