Google Camera from the Pixel smartphones certainly offers the best camera experience, thanks to features like Portrait Mode and HDR+. In this post, we will guide you on how to enable Camera2 API on Asus Zenfone Max Pro M1 without root and install Google Camera Port/Mod on it.
Advertisement
Asus Zenfone Max Pro M1 has been a huge success for the manufacturer, especially because of the hardware, affordable price, and pure Android experience. All this makes it one of the best budget smartphones in the market. However, there is one particular thing that could be considered as a drawback, and that is the camera. Despite the decent hardware, the phone failed to impress the users when it came to the camera quality. To overcome this, users often opt for installing and using the infamous Google Camera mod on the Asus Zenfone Max Pro M1.
The mod or port, as many would call it, requires the phone to support the Camera2 API. Even though the phone actually supports the said API, it is disabled by default. The most obvious way to enable Camera2 API on Asus Zenfone Max Pro M1 is to root it and use the Camera2 API Enabler Magisk Module. But that’s any old story now – “Why?” – Just read below.
Advertisement
How to Enable Camera2 API on Asus Zenfone Max Pro M1 without Root
Thanks to XDA Senior Member shakalaca, you can now enable Camera2 API on Asus Zenfone Max Pro M1 without rooting it. According to him, you can use a simple Fastboot method for enabling the Camera2 API and thus use the GCam Mod on your phone right away. The process is very simple and does not require any expertise. All you need is your phone, a PC with Android platform-tools set up, and some basic command-line knowledge.
During the steps below, we will mention ‘C:\adb‘ (For Windows) and ‘/Desktop/adb/” (For Linux/macOS). This is the location/folder/directory on the PC where the Android platform-tools (ADB/Fastboot) are present.
- Power off your Asus Zenfone Max Pro M1 completely.
- Then hold the Volume Up and Power button simultaneously to boot into Fastboot Mode.
- Connect the phone to the PC using the USB cable.
- Go to C:\adb on your Windows PC. Then, while holding the SHIFT key on the keyboard, right-click on an empty space and select ‘Open PowerShell window here’.
- If you’re using Linux/macOS, open the Terminal and enter the following command:
cd /Desktop/adb/
- Next, verify the connection between the phone and PC using:
fastboot devices
For Linux/macOS:
./fastboot devices
- Finally, enable Camera2 API on Asus Zenfone Max Pro M1 using the following command:
fastboot oem enable_camera_hal3 true
For Linux/macOS:
./fastboot oem enable_camera_hal3 true
- Once enabled, reboot your phone using:
fastboot reboot
To confirm that the method has worked, simple check Camera2 API support using our tutorial.
So, now that you have successfully enabled Camera2 API, follow the next step to install Google Camera Mod on Asus Zenfone Max Pro M1.
Install Google Camera Mod on Asus Zenfone Max Pro M1
Now, simply grabbing any Google Camera Mod and installing it on your phone wouldn’t work straight away, unless you’re lucky. There’s a specific version of the mod by Arnova8G2 that works correctly for the device. Users over at the XDA forums also have a dedicated thread for testing and feedback.
- Download Google Camera Mod for Asus Zenfone Max Pro M1: MGC_7.3.020_Parrot043_V8.apk
- If you have downloaded the APK to the PC, transfer it to the phone’s storage.
- Next, go to the app drawer and launch a file manager app of your choice.
- Navigate to the location where the APK is present.
- Simply tap on the ‘MGC_7.3.020_Parrot043_V8.apk’ file.

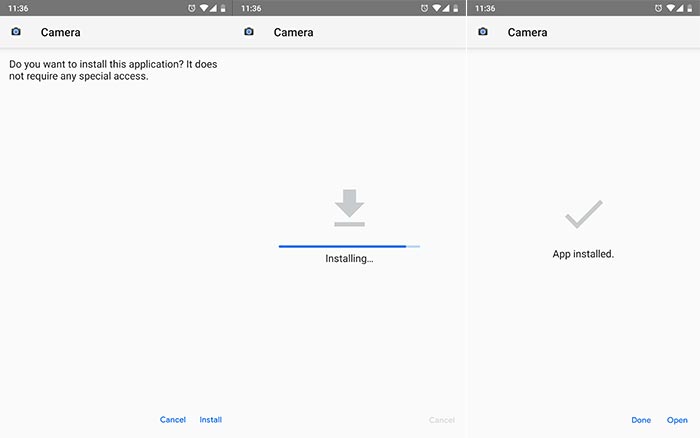
- Tap on ‘Install’ and follow the on-screen instructions.
Once installed, tap on ‘Done’ and go to the app drawer. Launch the Google Camera app and start using it.
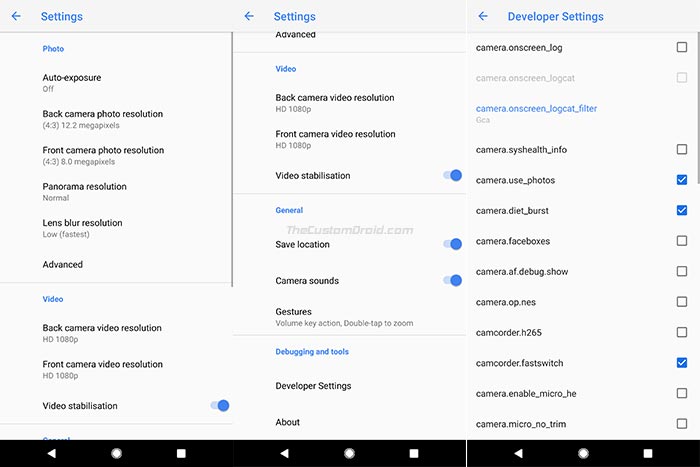
Note that since this is a port, all the features might not work as expected. Although users over at the feedback thread have success with it, in case it doesn’t work for you, then try using the latest version from here.
So there you go, you have just been able to enable Camera2 API on Asus Zenfone Max Pro M1 and install Google Camera Mod on it. Enjoy the improved camera quality and new camera features now. If you have any questions regarding the procedure, please let us know in the comments below.
Via: XDA Forums


Comments 4 Comments
Comments are moderated, and published only if they are relevant to the topic and add value in a constructive way. If you disagree with something, please be polite and respectful. We suggest you read our comment policy before commenting.
Does it make my warranty void??
Hi Dhruv. You must first unlock the phone’s bootloader. If you follow the official method to unlock, then yes, the warranty will end. But if you unlock via the unofficial method, then no, and you can always re-lock the bootloader.
Hello sir ,
Iam trying to enable camera2api option on my zenphone max pro m1 6gb varient ,I followed all the step correctly but when I check abd connection before entering into fastboot mode ,it says connected but once I put my device in fastboot and try to enter command it shows no devices is connected .iam trying it from several days but nothing happening .
Hi Sarang. While booted in the OS, “adb devices” should be used with USB debugging enabled. But in Fastboot/Bootloader mode, the following command will work: “fastboot devices”.