How to Install Xposed Framework on Android Oreo 8.0 and 8.1
The ultimate tool to customize your Android device now supports Oreo. In this guide, we will show you how to install Xposed Framework on Android Oreo 8.0 and 8.1. The instructions here […]
The ultimate tool to customize your Android device now supports Oreo. In this guide, we will show you how to install Xposed Framework on Android Oreo 8.0 and 8.1. The instructions here will help you flash Xposed using TWRP recovery or install it using Magisk.
Advertisement
Any Android user who has looked out the window to customize their Android phone by adding a bunch of extra features to it would surely have had their eyes on the Xposed Framework. Indeed, it is a really famous mod and has accompanied the development scene for quite some time now. For those who are new, Xposed is the easiest way to add core modifications and try new features on your Android, while still running stock firmware. The steps below will show you how to install Xposed Framework on Android Oreo devices.
- Install Xposed Framework on Nougat 7.0 and 7.1
- How to Customize AndroidOreo NavBar without Root
- How to Use Autofill on Android Oreo 8.0
Page Contents
Xposed Framework for Android Oreo 8.0 and 8.1
Android Oreo has been on the scene for more than four months now. But one of the most fundamental tools to customize Android devices has been missing support for the latest Android version.
It was back in October 2017, that Xposed finally supported Nougat, almost after a year. But that was solely due to the significant changes in the runtime environment. Last month, during late December, the developer finally made an official statement on the current development status and as it seemed, support for Oreo was imminent. Now finally, users can install Xposed Framework on Android Oreo with the release of Xposed v90 Beta.
Advertisement
Developer rovo89 announced Xposed for Android Oreo at the official XDA thread. Xposed v90 Beta now supports Android 8.0 Oreo (SDK 26) and Android 8.1 Oreo (SDK 27). The release notes include a few facts about this update, so make sure to take note of them first.
- While the release is tagged ‘Beta’, it has been confirmed to be stable for daily usage.
- A few apps may crash. The issue is being looked into and a fix shall be available through another Beta update.
The users already seem to be very cherished by the news. So, no matter how you are running Oreo on your device (Officially or unofficially), you can now install Xposed Framework on Android Oreo by following the instructions below.
Advertisement
Before you install, take a complete backup of your device before installing the framework. If possible, take a complete Nandroid backup of your current ROM setup. If you need help, you may follow our guide on how to backup Android devices.
Instructions to Install Xposed Framework on Android Oreo
Now, there are two different methods to install Xposed Framework on Android Oreo. For those using Magisk, can use method 1 to systemless-ly install the corresponding module. In case you’re using SuperSU for root, you can flash the official installer zip using TWRP recovery.
The method you choose depends on how convenient is proves to your current situation.
Advertisement
Method 1: Using Magisk
Developer – topjohnwu has released a Magisk module that will help you easily install Xposed Framework on Android Oreo without modifying the system.
- Go to the app drawer and launch ‘Magisk Manager’ app.
- Tap on the menu icon (3-horizontal lines) on the top-left of the screen and select ‘Downloads’.
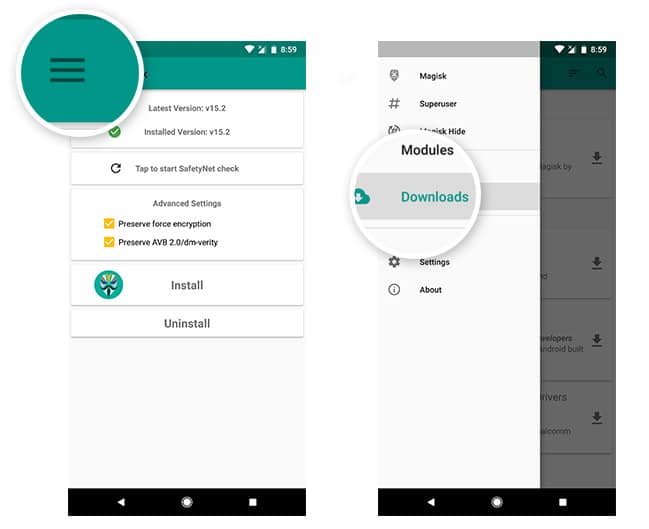
- Press the search icon and input ‘Xposed Framework’ in the field.
- Now, tap on the download icon next to the module name.
- Android 8.0 Oreo -> Xposed Framework (SDK 26)
- Android 8.1 Oreo -> Xposed Framework (SDK 27)
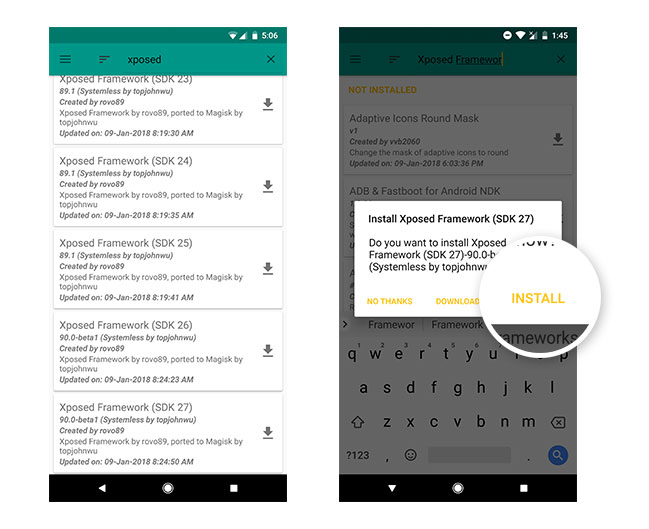
- Tap on ‘INSTALL’.
- Once the module has been downloaded, it will automatically install Xposed Framework on Android Oreo.
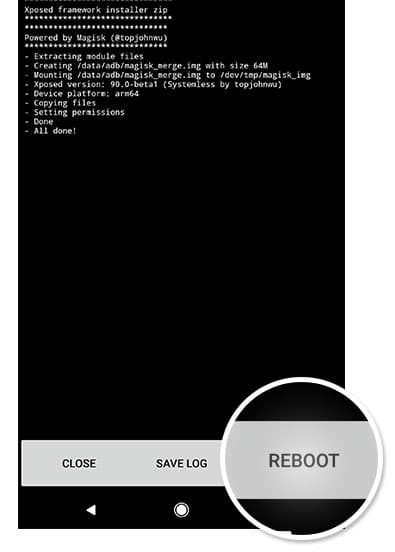
- Tap on ‘REBOOT’ to complete the process.
- The next step to perform before you can start using Xposed for Oreo, is to download the modified Xposed Installer app (Developed by topjohnwu) and install it on your device.
- So download the APK and install it on your device using a file manager: XposedInstaller_3.1.4_Magisk.apk
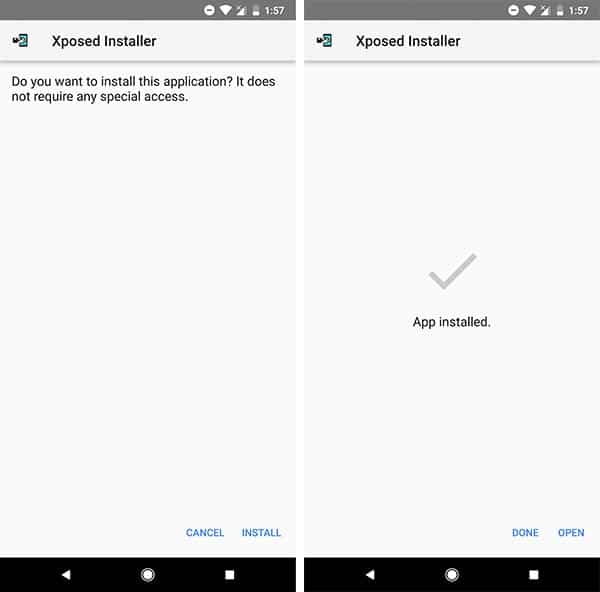
- Finally, reboot your device again. You have just succeeded to install Xposed Framework on Android Oreo.
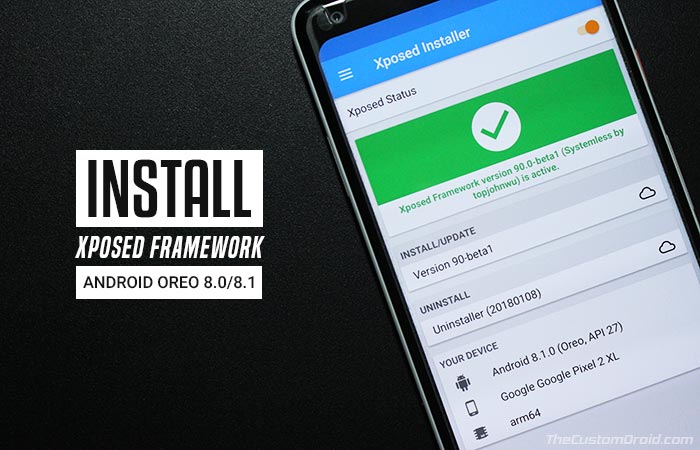
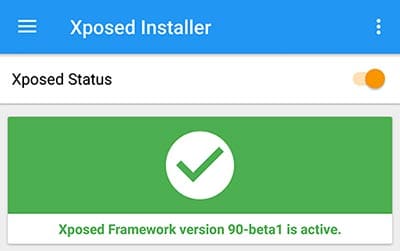
After your Android device boots, the app should show “Xposed Framework version 90.0-beta1 (Systemless by topjohnwu) is active“. You shall then proceed to download and install Xposed modules.
Method 2: Using TWRP Recovery
The next most convenient method to install Xposed Framework on Android Oreo is by flashing the official installer zip using TWRP. So, make sure you have the latest TWRP recovery installed on your device.
Advertisement
- Download the Xposed Installer Zip corresponding to the Android version installed on your device. Make sure to select the zip matching your device’s architecture – ARM, ARM64, or X86.
- Once the package has been downloaded, connect your phone to the PC in ‘Transfer files’ mode.
- Copy the file to the internal storage of your device.
- Disconnect and boot your phone into TWRP using the special button combination. Alternatively, you may use the following ADB command:
adb reboot recovery
- Go to ‘Install’ from the TWRP main menu.
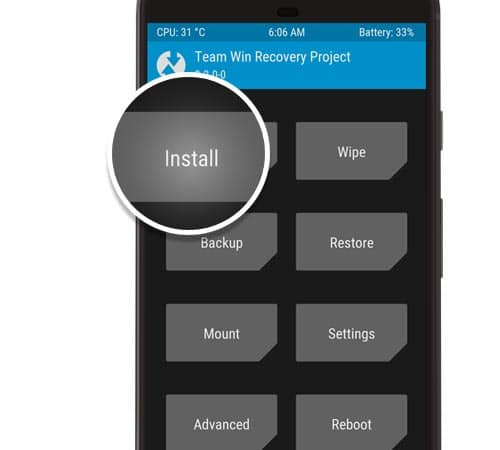
Flash installer zip to install Xposed Framework on Android Oreo - Navigate to the storage and select the installer zip (e.g. xposed-v90-sdk27-arm64-beta1.zip for Android 8.1 Oreo ARM64).
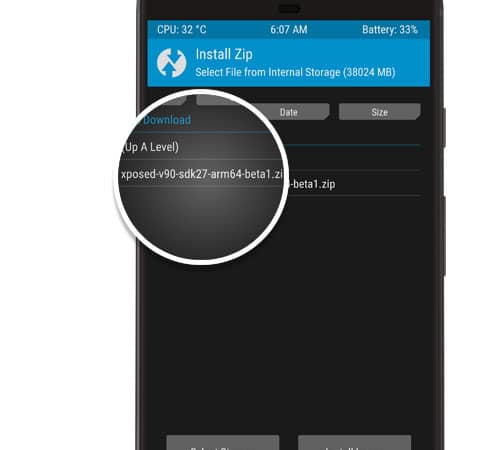
- Finally, swipe the ‘Swipe to confirm Flash’ button to install Xposed Framework on Android Oreo. The flashing process shouldn’t take more than a few seconds to complete.
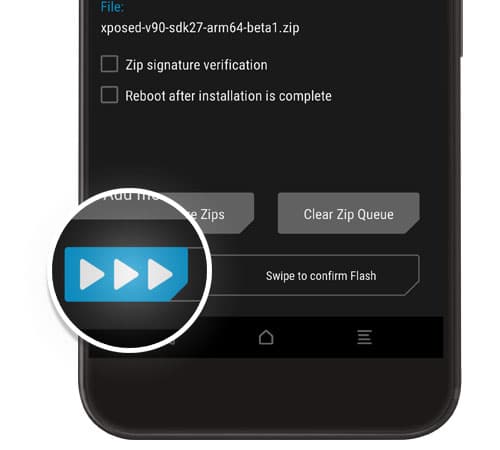
- Once installed, tap on ‘Reboot System’.
- After your device boots, download the official Installer app and install it on your phone: XposedInstaller_3.1.4.apk
- The app shall show the “Xposed Framework version 90.0-beta1 is active” message, which means you have been successful to install Xposed Framework on Android Oreo.
You shall now go ahead and start installing modules on your device. The official repository is filled with hundreds of unique modules for adding different features on any supported device. But be careful and make sure that any module you download is compatible with Android Oreo.
Check out more tips for Android Oreo:
So you have just been able to install Xposed Framework on Android Oreo 8.0 and 8.1. If you have any questions regarding the installation process, leave a comment below.
Comments 2 Comments
Very good information for Xposed Framework installation and usage.
I own Nokia 1 android Go; can I install this on my device for enabling additional features.
Regards,
Manan
Hi Manan, I would rather recommend Magisk now. It seems to offer better/latest modifications without touching the /system partition.
Xposed modules haven’t seen much development lately, so I’d personally avoid it until you need a very specific module from it.