How to Root Android using SuperSU ZIP and TWRP Recovery
Follow this guide to download and install SuperSU zip using TWRP recovery and root your Android device. Advertisement Android is a versatile OS and provides enormous possibilities for both the developers and […]
Follow this guide to download and install SuperSU zip using TWRP recovery and root your Android device.
Advertisement
Android is a versatile OS and provides enormous possibilities for both the developers and the users. However, manufacturers often tend to bind its devices with services and proprietary software, that not every user would like. In such a case, you would like to root the device. Rooting is a pretty broad term when it concerns Android. As a general rule of thumb, it allows you to customize your device beyond the manufacturer’s limitations. The instructions below will help you easily root Android using SuperSU ZIP.
Page Contents
Guide to Root Android using SuperSU ZIP and TWRP Recovery
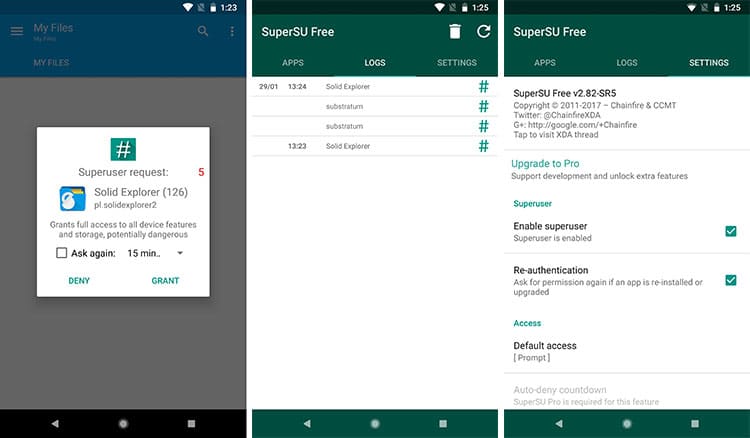
Rooting an Android device can often be confusing for those who are stepping in for the first time. For instance, unmanaged root access can allow any app/service to perform actions on your Android device. These permissions could be leveraged to inject malware or steal personal information. However, that’s not the case when you install SuperSU ZIP on Android and use it for effective management of root permissions.
What is SuperSU?
SuperSU is one of most renowned and efficient root solution for Android and was brought into existence by Chainfire. It was introduced as a mainstream app to manage root access rights. The developer focused on creating a unique GUI for end users to handle root permissions easily. Not just that, it also offers several other features to make the overall rooting process more powerful and efficient.
Advertisement
Advertisement

Before you head over to the instructions and install SuperSU Zip, let us take a look at a few benefits of using it as your go-to root solution.
Advertisement
- Easiest root procedure.
- Allows you to control root permissions for individual apps.
- Logs information to locate the frequency of root permission requested by an app.
- Perform a full unroot and restore back to the stock state.
- In short, it just makes your life a bit easier!
Prerequisites
- In order to root Android using SuperSU zip, you must first enable OEM unlocking and unlock the phone’s bootloader.
- You must also install TWRP recovery on your Android device.
- Before you follow the steps, make sure to take a complete backup of your phone. We strongly recommend that you take a Nandroid backup of your complete ROM. For all this, you can follow our guide on how to backup Android phones.
- Enable USB debugging on the device.
- Also, install Android SDK tools on your PC.
Download SuperSU ZIP
Chainfire provides the root packages via two different channels – SR (Service Release)/BETA and Stable versions. For your convenience, we have provided official links for both. It is always advised to use the latest BETA version since it accommodates the most recent changes and support for newer Android versions like Android Oreo 8.0 and 8.1.
The download links from the official website are down. XDA Recognized Contributor Ibuprophen has uploaded all the releases to AndroidFileHost. All the credit goes to him.
Advertisement
- UPDATE-SuperSU-v2.82-20170528234214.zip (Latest and recommended)
- SR5-SuperSU-v2.82-SR5-20171001224502.zip
- UPDATE-SuperSU-v2.80-20170524085154.zip
- UPDATE-SuperSU-v2.79.zip
- UPDATE-SuperSU-v2.78.zip
- UPDATE-SuperSU-v2.76.zip
Download SuperSU APK
- SuperSU v2.82.1 (Latest and recommended)
- SuperSU 2.82-SR5
- SuperSU v2.79
- SuperSU v2.78
- SuperSU v2.76
How to Root Android using SuperSU ZIP?
- Download the flashable root ZIP package.
- Connect the Android device to the PC using the USB cable.
- Enable MTP/Transfer files mode on the device.
- Transfer the downloaded ZIP file to the device’s internal/external storage.
- Disconnect the device from the PC.
- Boot TWRP recovery on Android using the buttons combination. Or, use the following ADB command:
adb reboot recovery
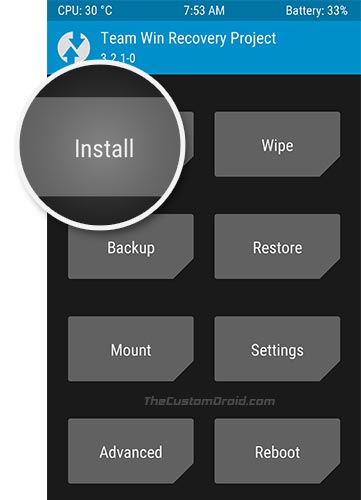
- In TWRP, tap on the ‘Install’ button.

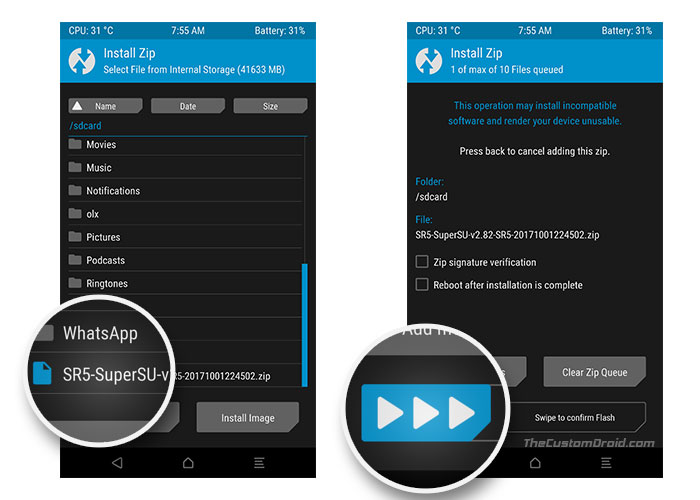
- Navigate to the storage and select the ZIP file.
- Swipe the button on the screen to install SuperSU ZIP on Android.

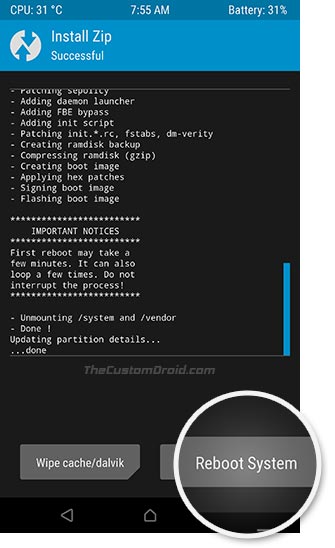
- Finally, hit the ‘Reboot System’ button.

These steps will not only root your device but will also install the official companion app. So once your phone boots, you can start using root-enabled apps and you shall be prompted to allow/deny root permissions. You can easily update the official app directly from the Play Store. But if you would like to manually install the latest version, then you can download the APK from above and sideload it on your Android device.
How to Uninstall SuperSU?
- Open “SuperSU” app.
- Go to the “Settings” tab.
- Scroll down below to the “Cleanup” section.
- Tap on “Full Unroot” to uninstall SuperSU and unroot your phone.
- Confirm by pressing “Continue”.
- Reboot your phone.
Conclusion
Now that you have succeeded to root Android using SuperSU, you are all set to use root apps. You can also go ahead and tweak your device with mods like ViPER4Android, Xposed Framework, and more. There’s a lot more you can do now, so explore the possibilities and customize your Android with third-party apps/mods. This is not the only method, you can alternatively root Android devices using Magisk.
So you have just been able to download SuperSU zip and root your Android phone. If you have any questions regarding the procedure, let us know by commenting below.
Comments 2 Comments
I’m stuck on the boot logo after installing the latest Supersu zip. I use a Moto E 2nd Generation 2015 (surnia) with TWRP 3.2.3.0 recovery, SomeFeaK 9.99-1-S1 kernel and Lineage OS 14.1 unofficial.
Hi Jordan. Please uninstall SuperSU by flashing this zip via TWRP. Once flashed, install Magisk 18.0 zip.